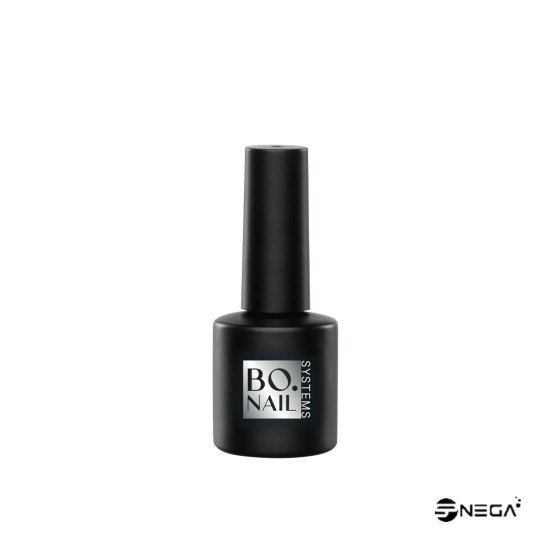
BO Soakable Base Gel forms part of the Soakable Gel Polish System. It primes
nail plates for an optimal adhesion and prevents lifting of the Soakable
Gel Polish. It is this
perfectly formulated base gel that allows for perfect removal of the Gel Polish
application in just 10 minutes!
FEATURES
& BENEFITS
·
Ideal
base for natural nails and also suitable for artificial nails (gels and
acrylics)
·
Also
ideal for toe nails
·
Easy
application – applies like a polish
·
Easy
removal in just 10 minutes
·
Lasts
beautifully for up to 4 weeks
·
No
damage to natural nails
·
No
odor
· No waiting for polish to dry
· 7 ml
·
Curing:
120 sec. UV / 30 sec. LED
USAGE
Step
1: Prepare the natural
nail as usual and apply BO. Natural Nail Sanitizer onto the natural nail plate.
Allow to fully dry before applying BO. Soakable Base Gel.
Step
2: BO. Soakable Base
Gel – Wipe the brush off on the bottle neck to remove excess product. Cap the
free edge of the nail to ensure durability and prevent shrinkage of the
product. Holding the brush horizontal to the nail, apply a thin layer of BO.
Soakable Base Gel over the entire nail from cuticle area to free edge. Cure all
four fingers together for 120 sec. UV / 30 sec. LED. Repeat the process on the
other hand then on the thumbs. Optional: brush with a clean gel brush to remove
excess tacky cured base gel to decrease the chance of shrinkage and to get a
smoother color application.
Step
3: BO. Soakable Gel
Polish Color - Roll the bottle upside down between the palms of your hands to
ensure that the color is thoroughly mixed. Cap the free edge with BO. Soakable
Gel Polish to ensure durability and prevent shrinkage of the color. Holding the
brush horizontal to the nail continue to the center of the nail. Move the brush
from the center of the nail up towards the proximal nail fold and then stroke
it down towards the free edge. Ensure to keep polish off the skin. If polish
has touched the skin remove prior to curing the nail by using BO. Gel Cleanser
and a Cuticle Pusher. Cure all four nails for 120 sec. UV / 30 sec. LED. Repeat
the process on the other hand and thumbs.
Step
4: BO. Soakable Gel
Polish Color - Apply a second thin coat of polish using the same process. This
coat provides full coverage. NOTE: if using a highly pigmented shade or a
different lamp, it may be necessary to cure a second time to ensure that it is
completely cured and that no color bleeds into your Top Gel application.
Step
5: BO. Soakable Top Gel
- Wipe the brush off on the bottle neck to remove excess product. Cap the free
edge of the nail to ensure durability and prevent shrinkage of the product.
Holding the brush horizontal to the nail, apply a thin layer of BO. Soakable
Top Gel to each nail surface of all four nails on one hand. Cure all four nails
for 120 sec. UV / 30 sec. LED. Repeat on the other hand and finish with thumb
application.
Step
6: If using BO.
Soakable Top Gel or BO. Soakable Matte Top Gel it will be necessary to cleanse
after curing. Saturate a gel sponge with BO. Gel Cleanser. With light pressure
wipe away the top gel film, (this is the sticky inhibition layer). CAUTION: Do
not re-wipe the nail with a used portion of the gel sponge, as it will
redistribute the film causing dulling to the Top Gel. Use a clean saturated gel
sponge for each finger. Tip: Wait with cleansing for about 1 minute after
curing to let the nails “cool down” to get even more shine.
REMOVAL – BO. Soakable Gel Remover
Step
1: Have the client wash their hands with liquid soap and warm water. Towel dry
hands and use BO. HygiSpray or BO. HygiGel.
Step
2: Remove the seal on each nail using a BO. Hygiene File 180 Grit. Saturate a
Nail Foil with BO. Soakable Gel Remover and secure the foil firmly around the
finger.
Step
3: Leave the Nail Foil on the finger for ten minutes. Using a twisting motion,
pull the Nail Foil and product from the fingernail.
Step
4: If necessary, gently remove any excess Gel Polish using with a Cuticle
Pusher. Be careful not to scrape away the surface layers of the natural nail
plate.
REMOVAL
– BO. Gelbreaker
Step
1: For best results, first remove the top layer with a 180 grid file.
Step
2: Apply a generous layer of BO. Gelbreaker. Avoid contact with the skin.
Step
3: Wait 3 to 5 minutes. The gel polish will begin to break down and you will
see fine cracks on the surface of the gel polish.
Step 4: Once the breaking stops, you can remove the remaining residue of the gel polish with a Cuticle Pusher or a woodstick.
Step 5: Wash hands thoroughly
Unlimited Blocks, Tabs or Accordions with any HTML content can be assigned to any individual product or to certain groups of products, like entire categories, brands, products with specific options, attributes, price range, etc. You can indicate any criteria via the advanced product assignment mechanism and only those products matching your criteria will display the modules.
Also, any module can be selectively activated per device (desktop/tablet/phone), customer login status and other criteria. Imagine the possibilities.
- Stock: In Stock
- Model: 6520 BO. Base Gel -podlak, 7ml
- Weight: 0.16kg


